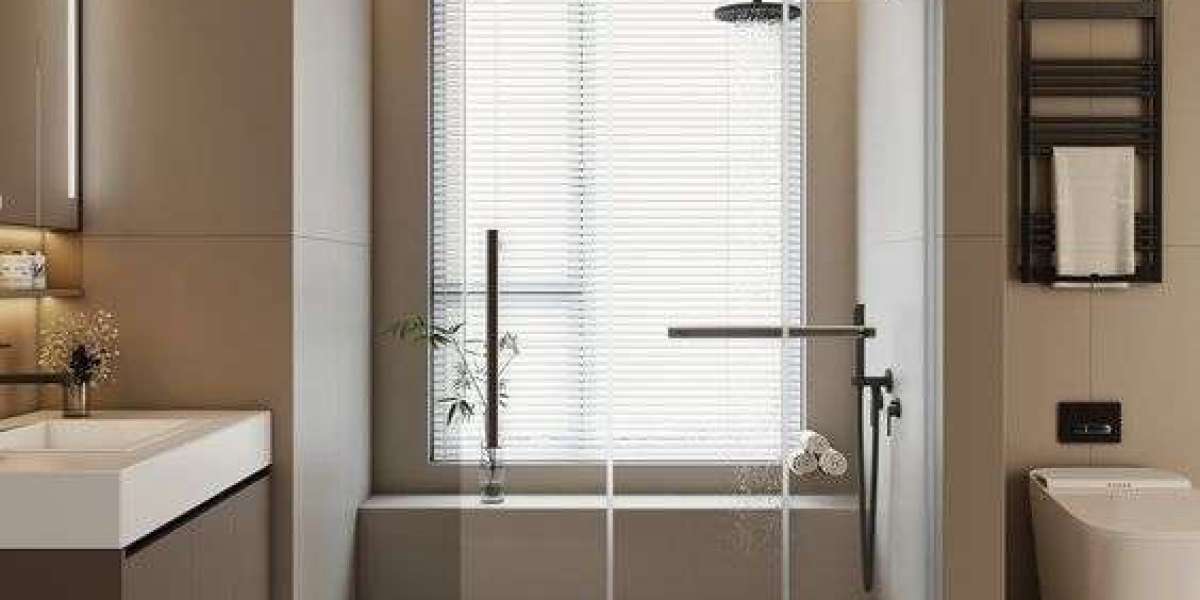
Installing frameless glass shower doors can transform your bathroom into a sleek and modern space. At McDowell Glass, we specialize in providing high-quality glass solutions that enhance both functionality and aesthetics. In this guide, we will walk you through the steps of installing frameless glass shower doors, ensuring a professional and seamless finish.
Understanding Frameless Glass Shower Doors
Measure the Shower Opening
Accurate measurements are crucial for a successful installation. Use a measuring tape to determine the width and height of the shower opening. Measure at multiple points (top, middle, and bottom) to account for any variations. Record these measurements and double-check for accuracy. Providing precise dimensions when ordering your glass panels from McDowell Glass will ensure a perfect fit.
Prepare the Area
Clear the shower area of any obstructions and ensure the surfaces are clean and dry. If you are replacing an existing shower door, remove it carefully along with any old hardware. This step provides a fresh start and ensures a clean surface for the new installation.
Install the Hinges
Position the hinges on the glass panels according to the manufacturer's instructions. Mark the locations on the wall where the hinges will be attached. Drill holes for the wall anchors at these marked points. Secure the hinges to the wall using screws and ensure they are level and firmly attached. It's essential to follow the manufacturer's guidelines to guarantee the hinges are installed correctly and can support the weight of the glass.
Attach the Glass Panels
With the hinges in place, it's time to attach the glass panels. Carefully lift the glass panel and align it with the hinges. Insert the hinge pins or screws through the pre-drilled holes in the glass, securing them tightly. Enlist the help of another person if necessary to hold the glass steady while you fasten the hinges. Make sure the glass panel is level and plumb before tightening the screws completely.
Install Brackets and Support Bars
To enhance the stability of the frameless glass shower doors, install additional brackets and support bars as needed. These components provide extra support and prevent the glass from shifting. Follow the manufacturer's instructions for the placement and installation of these support elements. Secure them firmly to both the glass and the wall.
Seal the Edges
To prevent water leakage, apply a thin bead of silicone sealant along the edges of the glass panels where they meet the wall and floor. Use a caulking gun for precise application and smooth the sealant with a caulk finishing tool or your finger. Allow the sealant to cure according to the manufacturer's recommendations before using the shower.
Final Adjustments
Once the installation is complete, check the alignment and operation of the shower doors. Open and close the doors to ensure they move smoothly and do not rub against any surfaces. Make any necessary adjustments to the hinges or brackets to achieve a perfect fit. Tighten all screws and fittings to ensure everything is secure.
Conclusion
Installing frameless shower doors can elevate the look of your bathroom while providing a functional and durable solution. By following these steps and using high-quality materials from McDowell Glass, you can achieve a professional installation that enhances your space. If you have any questions or need assistance with your project, don't hesitate to contact us at McDowell Glass. Our team of experts is here to help you every step of the way.